Integrating Keycloak with OpenStack using OpenID Connect
Introduction
Keycloak is a popular Open Source Identity and Access Management platform that allows for centralized user management. The best part of running an external IAM system is being able to use the same set of users across multiple systems/applications. Since Keycloak supports both SAML and OpenID Connect (OIDC), it can communicate to a wide variety of applications in a standardized format.
OpenStack with Kolla Ansible has a very simple integration with OIDC that works really well once it’s set up. My work stands on the shoulders of giants who built these integrations (and I am very grateful for them!) who deserve the credit.
Our Use Case
For the private cloud that I help operate we need a few things:
- A tenant provisioned for every dues paying member
- This can be up to 400+ tenants per year
- Ability to dynamically assign groups to change what tenants users can see
- Easily deprovision users and tenants every year after dues have expired
Our single sign on (SSO) requirements were:
- Have federation capabilities with Active Directory
- Has a documented API that can interact with our Onboarding application
- Can be hosted on our infrastructure
- Can be used with custom attributes that are administrator defined
- Has a user facing web portal that can be used to handle password resets, MFA, and application access
While there are several different SSO options that we could use, we decided on Keycloak instead of other choices such as Authentik or Authelia since they are more difficult to run in a production environment on Kubernetes. We also decided to use Keycloak over a commercial option due to our rotating user list that can change rapidly. We did not want to buy a solution like Okta or Jumpcloud and potentially go over our allocation or pay for more licensing than we needed.
Configuring Keycloak for OpenStack Federation
As of writing this article, we are running the admin v2 interface with Keycloak 25. This means we are running the Quarkus version of Keycloak, if you are running Wildfly (< KC 17) this guide won’t be accurate! We are running a stock Keycloak image with customizations for allowing a trusted cert store and kerberos keytab file for Active Directory.
Creating the Client
The first step is to create the OpenID Connect client in Keycloak for OpenStack. This can be done by clicking the Create Client button under the Manage -> Clients tab in the Keycloak realm you want to configure.
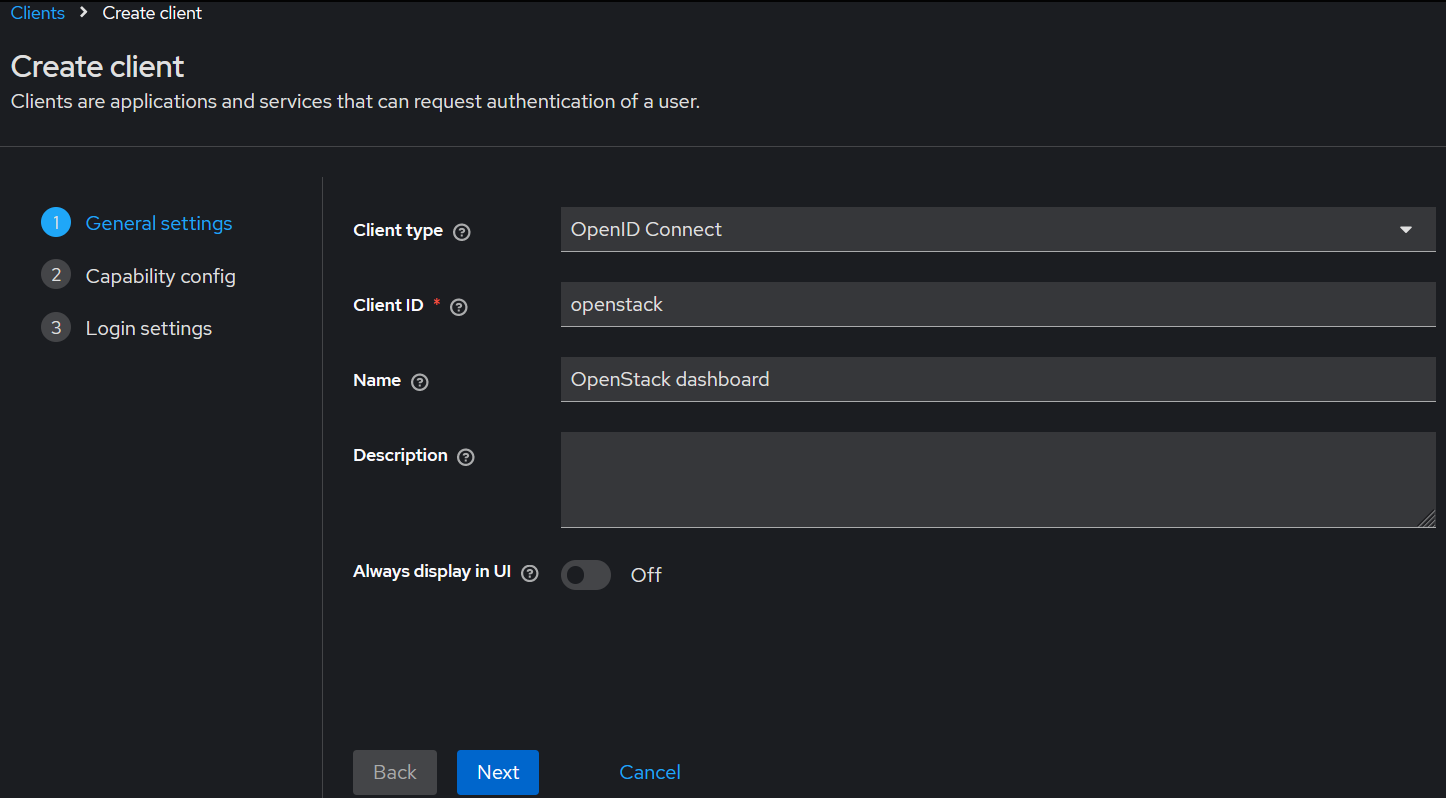
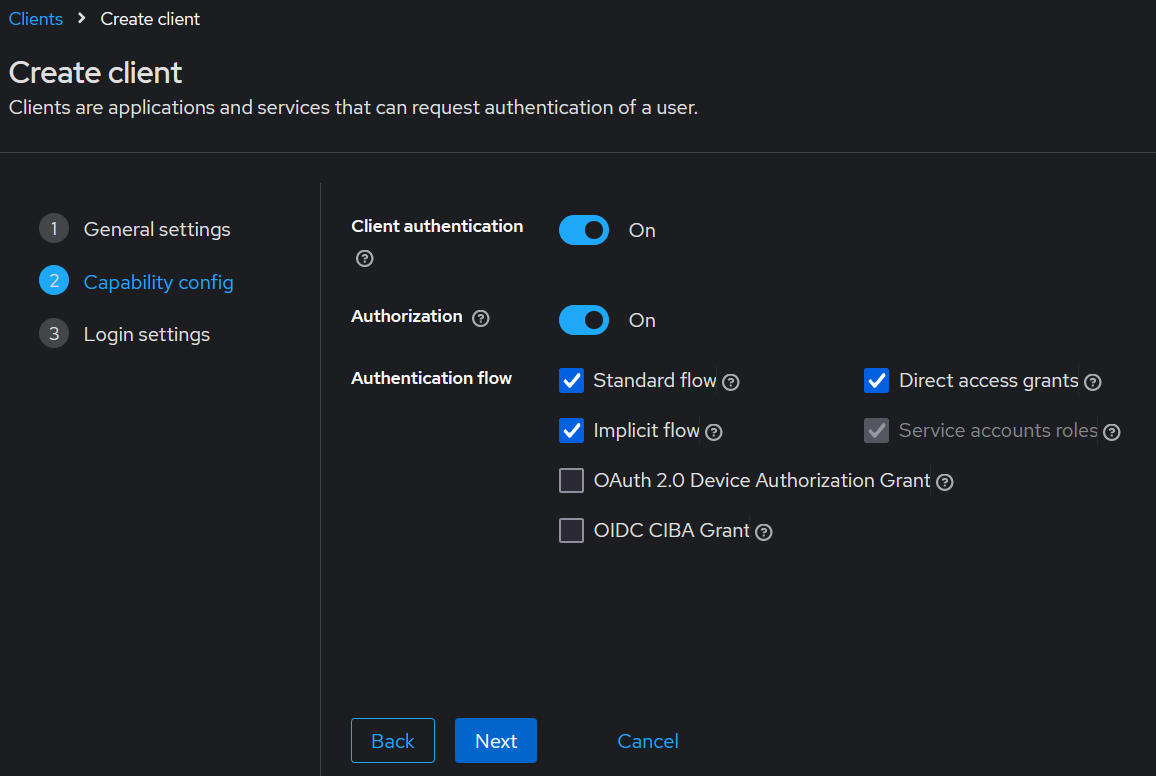
When configuring the capabilities for the client, turn on client authentication (confidential flow), authorization (optional),and implicit flow (for openstack cli).
If you are configuring the client for production use:
- Set Home URL to Horizon/Skyline dashboard url (ex:
https://horizon.example.com) - Set Valid Redirect URIs for:
- Keystone api redirect URI (
https://keystone.example.com:5000/redirect_uri) - Horizon dashboard URI (
https://horizon.example.com) - Skyline dashboard if applicable (
https://skyline.example.com)
- Keystone api redirect URI (
- Set Web Origins for:
- Keystone api (
https://keystone.example.com:5000) - Horizon dashboard (
https://horizon.example.com) - Skyline dashboard (
https://skyline.example.com)
- Keystone api (
Additional Keycloak configuration
Depending on how you want to configure your OpenStack cloud, you can create different customizations to Keycloak to better suit your needs. For our use case for our Private Cloud, we use roles that we built out in Keycloak to interface with group assignments in OpenStack which give access to privileged tenants. These tenants have access to administrative functionality or development environments.
We used composite Keycloak roles to create fine grained control of what privileges people have on our environment. We created roles in the specific clients and added them as associated roles in the greater Realm Roles category.
Configuring the OpenStack integration
There are several items that need to be collected to function:
- OIDC Well known metadata
- OIDC Client ID/Secret pair
- JWKS Cert for Openstack CLI Auth
The finalized tree structure for sso folder looks like so:
1
2
3
4
5
6
7
8
9
.
├── attr_map
│   └── attribute_mapping.json
├── certs
│   └── kid.pem
└── meta-idp
    ├── keycloak.example.com%2Frealms%2Fprod.conf
    ├── keycloak.example.com%2Frealms%2Fprod.provider
    └── keycloak.example.com%2Frealms%2Fprod.secret
Getting the Well known metadata
The metadata can be found in the Keycloak Realm Settings -> General Settings -> Endpoints -> OpenID Endpoint Configuration link. If you just download the JSON object and try to use it, it won’t work. You need to beautify the JSON before OpenStack will be able to use it.
The code should look something like this:
1
2
3
4
5
{
  "issuer": "https://keycloak.example.com/realms/prod",
  "authorization_endpoint": "https://keycloak.example.com/realms/prod/protocol/openid-connect/auth",
  ...
}
The website JSON beautify is an easy way to convert the raw payload into a beautified version.
This file should be saved as the name of the issuer URL minus the https:// and replacing / as the escaped version %2F. As such, the file would be named keycloak.example.com%2Frealms%2Fprod.provider.
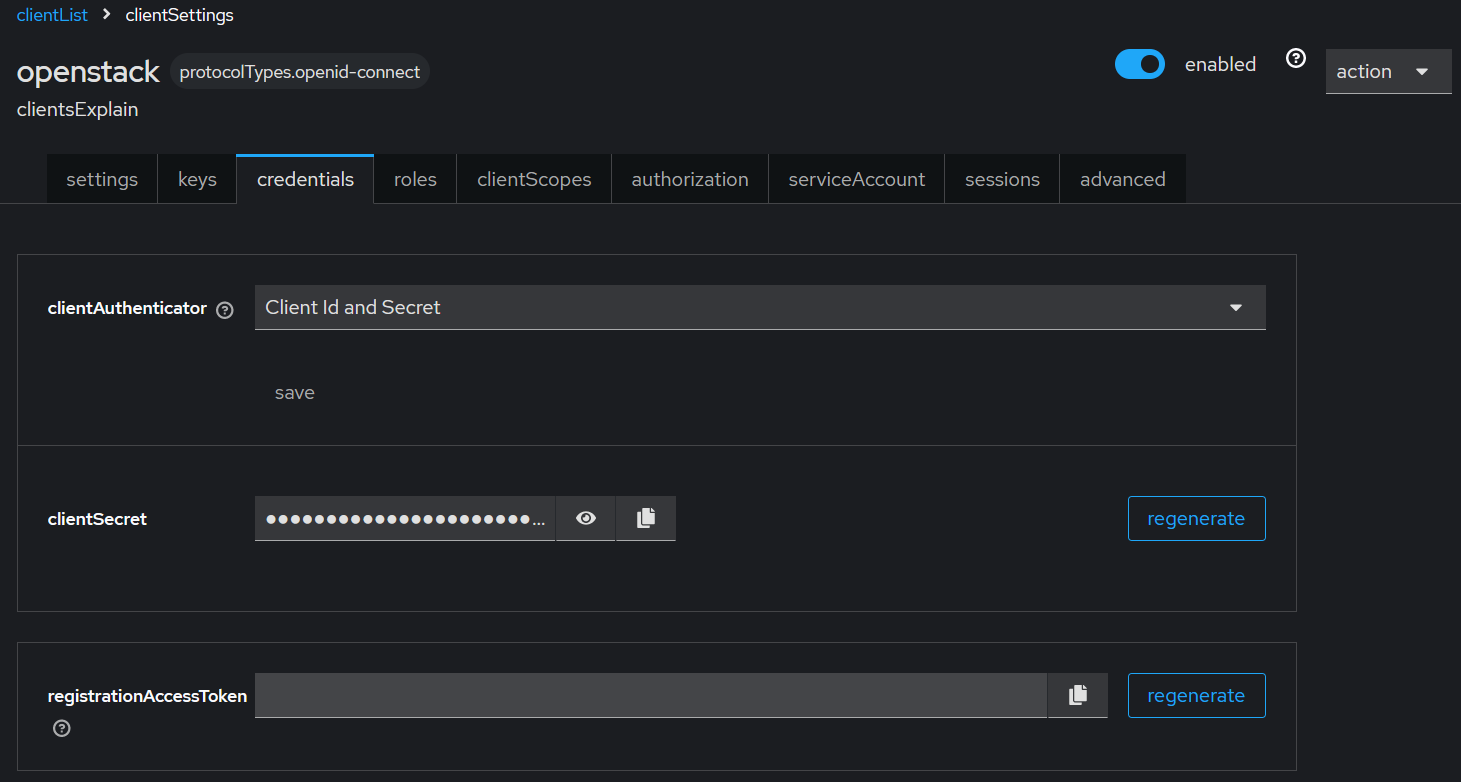
Finding the Client ID/secret pair
You can find the client secret by navigating to Manage -> Clients -> <client name> -> credentials -> clientSecret field and copying it.
Afterwards, create a file following the format below:
1
2
3
4
{
  "client_id":"<insert keycloak client id>",
  "client_secret":"<insert copied keycloak secret>"
}
Creating the metadata provider config file
This file contains any additional configuration for the apache2 modauth plugin. By default you can leave this as a blank file with curly braces. It should follow the structure of the previous files above.
1
{}
Getting the JWKS certificate
To be able to use the Openstack CLI with federated OpenStack, you need to get the JWKS that Keycloak generates for the realm. This can be found in Configure -> Realm Settings -> Keys -> Key list with the use of the SIG (signature) and has the button for Certificate.
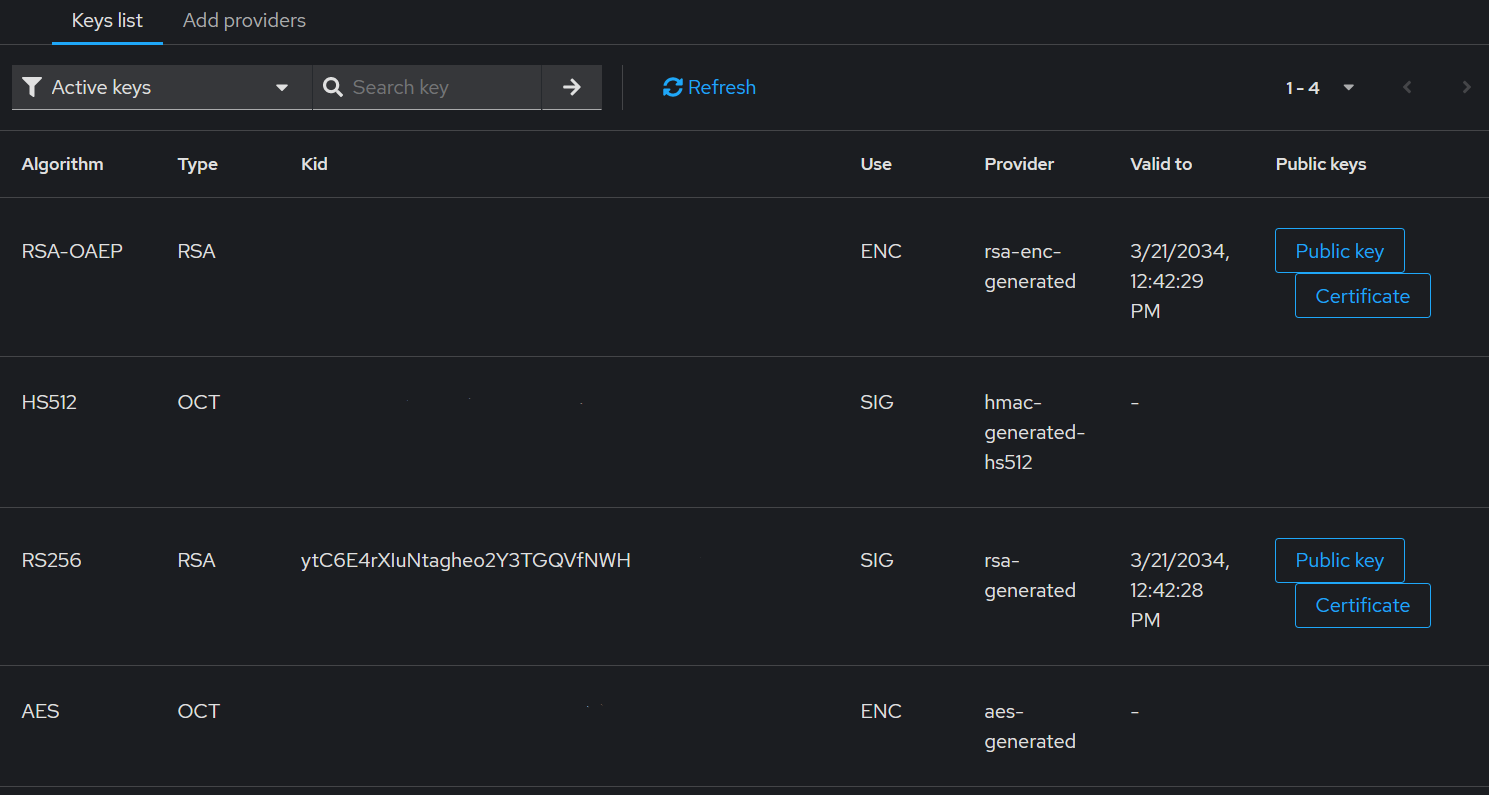
Once you click on the Certificate button, copy the value and create a file with the pem (PKCS7 format) extension with the name of the file being the kid value under the /certs/ folder.
1
2
3
4
-----BEGIN CERTIFICATE-----
<paste keycloak jwks cert here>
-----END CERTIFICATE-----
Configuring the attribute map
The attribute map is going to be the file that changes the most from org to org. Our mapping is based off of best practice, which suggests to first create users then assign them groups. In our case, we have a failsafe which prevents a user from being created in OpenStack if there is no associated personal tenant (they haven’t paid for dues).
This first block maps our the remote identity provider (Keycloak) to the local identity provider (Keystone/OpenStack) with the “hackucf” domain. With this example, we map the user fields of name and email from Keycloak to their respective fields in OpenStack.
1
2
3
4
5
6
7
8
9
10
11
12
13
14
15
16
17
18
19
20
21
{
  "local": [
    {
      "user": {
        "name": "{0}",
        "email": "{1}",
        "domain": {
          "name": "hackucf"
        }
      }
    }
  ],
  "remote": [
    {
      "type": "OIDC-preferred_username"
    },
    {
      "type": "OIDC-email"
    }
  ]
}
Adding on top of this, we can add in a domain specifier to ensure that everything runs smoothly.
1
2
3
4
5
6
7
8
9
{
  "local": [
    {
      "domain": {
        "name": "hackucf"
      }
    }
  ]
}
For the final part of the first block, we add in functionality to assign a personal tenant to each member based off of their unique member uuid. This last part of the block enforces that a user has paid their membership dues since mapping rules fail if one condition does not match.
1
2
3
4
5
6
7
8
9
10
11
12
13
14
15
16
17
18
19
20
21
{
  "local": [
    {
      "projects": [
        {
          "name": "{2}",
          "roles": [
            {
              "name": "member"
            }
          ]
        }
      ]
    }
  ],
  "remote": [
    {
      "type": "OIDC-openstack-default-project"
    }
  ]
}
Putting this all together, our first mapping rule looks something like this:
1
2
3
4
5
6
7
8
9
10
11
12
13
14
15
16
17
18
19
20
21
22
23
24
25
26
27
28
29
30
31
32
33
34
35
36
37
{
  "local": [
    {
      "user": {
        "name": "{0}",
        "email": "{1}",
        "domain": {
          "name": "hackucf"
        }
      },
      "domain": {
        "name": "hackucf"
      },
      "projects": [
        {
          "name": "{2}",
          "roles": [
            {
              "name": "member"
            }
          ]
        }
      ]
    }
  ],
  "remote": [
    {
      "type": "OIDC-preferred_username"
    },
    {
      "type": "OIDC-email"
    },
    {
      "type": "OIDC-openstack-default-project"
    }
  ]
}
After this main mapping, we have many rules for adding users to groups that have privileged access. I won’t go into all the specifics but based off of the configuration that we did with Keycloak we map those roles to groups that exist in Keycloak like so:
1
2
3
4
5
6
7
8
9
10
11
12
13
14
15
16
17
18
19
20
{
  "local": [
    {
      "groups": {
        "name": "hpcc",
        "domain": {
          "name": "default"
        }
      }
    }
  ],
  "remote": [
    {
      "type": "OIDC-groups",
      "any_one_of": [
        "HPCC Staff"
      ]
    }
  ]
}
So in totality, we need to put these rules in an array and then we can add it to the folder with the rest of our work. The finalized mapping file would look something like this:
1
2
3
4
5
6
7
8
9
10
11
12
13
14
15
16
17
18
19
20
21
22
23
24
25
26
27
28
29
30
31
32
33
34
35
36
37
38
39
40
41
42
43
44
45
46
47
48
49
50
51
52
53
54
55
56
57
58
59
[
  {
    "local": [
      {
        "user": {
          "name": "{0}",
          "email": "{1}",
          "domain": {
            "name": "hackucf"
          }
        },
        "domain": {
          "name": "hackucf"
        },
        "projects": [
          {
            "name": "{2}",
            "roles": [
              {
                "name": "member"
              }
            ]
          }
        ]
      }
    ],
    "remote": [
      {
        "type": "OIDC-preferred_username"
      },
      {
        "type": "OIDC-email"
      },
      {
        "type": "OIDC-openstack-default-project"
      }
    ]
  },
  {
    "local": [
      {
        "groups": {
          "name": "hpcc",
          "domain": {
            "name": "default"
          }
        }
      }
    ],
    "remote": [
      {
        "type": "OIDC-groups",
        "any_one_of": [
          "HPCC Staff"
        ]
      }
    ]
  }
]
Configuring Kolla Ansible
The last step to getting the integration functional is to tell Kolla that it is configurable with federated identity. Keycloak requires a few extra configurations that would be useful if running in a production environment.
To ensure that there isn’t any confusion in the auth flow, setting horizon_use_keystone_public_url to true helps avoid any issues when setting origins in Keycloak. The OIDCTokenBindingPolicy is optional but recommended in the Kolla documentation for Keycloak.
The keystone_identity_providers block maps the different identity providers. If you had multiple identity providers that you wanted your clients to use, this is where you would specify them. All of these different fields map to different parts of the federation process:
name: Name of the identity provider in OpenStackopenstack_domain: OpenStack domain to place users in, creates if doesn’t exist. (Optional)protocol: SAML or OpenID. OpenID is the only choice for automated setupidentifier: URL of the well known metadata endpointpublic_name: What you want the dropdown name to beattribute_mapping: Which mapping to select fromkeystone_identity_mappingsmetadata_folder: Where all the Keycloak endpoint metadata is locatedcertificate_file: Location of the JWKS certificate
The keystone_identity_mappings block just takes the attribute maps and gives them nicer names.
name: Name of the mapping (make this descriptive!). Identical to value ofkeystone_identity_providers.attribute_mappingfile: Location of theattribute_mapping.jsonfile
1
2
3
4
5
6
7
8
9
10
11
12
13
14
15
16
17
18
19
20
21
22
### This is a snippet of the kolla globals file focusing on the keystone integration.
### I would put this under the Keystone - Identity Options section to keep everything
### logically organized. Certain fields have been sanitized to redact file locations.

keystone_identity_providers:
  - name: "prod"
    openstack_domain: "hackucf"
    protocol: "openid"
    identifier: "https://keycloak.example.com/realms/prod"
    public_name: "SSO"
    attribute_mapping: "sso_mapping"
    metadata_folder: "/etc/idp/meta-idp"
    certificate_file: "/etc/idp/certs/ytC6E4rXIuNtagheo2Y3TGQVfNWH.pem"

keystone_identity_mappings:
  - name: "sso_mapping"
    file: "/etc/idp/attr_map/attribute_mapping.json"

keystone_federation_oidc_additional_options:
  OIDCTokenBindingPolicy: disabled

horizon_use_keystone_public_url: true
After the code has been added to the globals.yml file, the only thing left to do is run a redeploy of Kolla Ansible.
Run kolla-ansible -i multinode deploy -t keystone and wait for the process to finish. If everything worked correctly, there should now be a dropdown on horizon that allows you to select another authentication source.
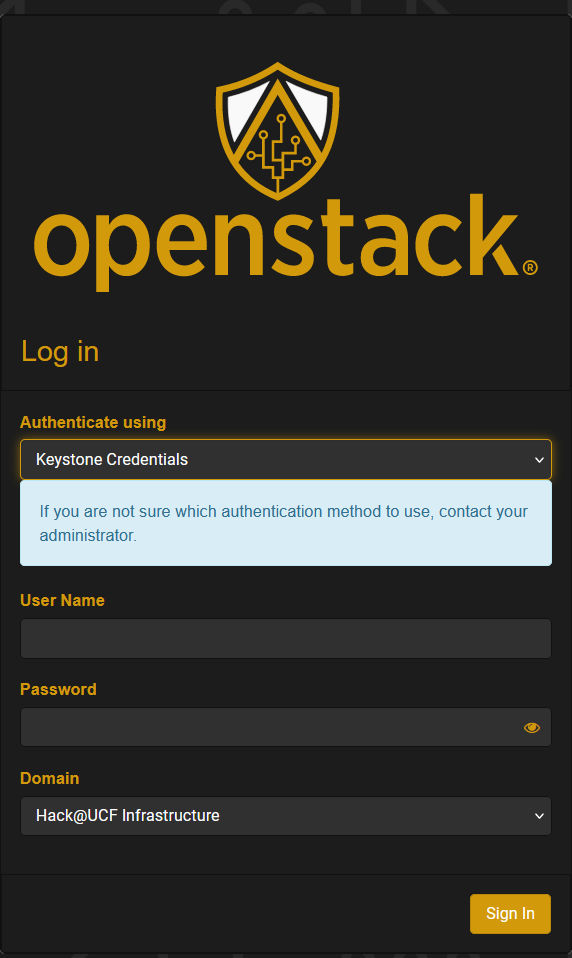
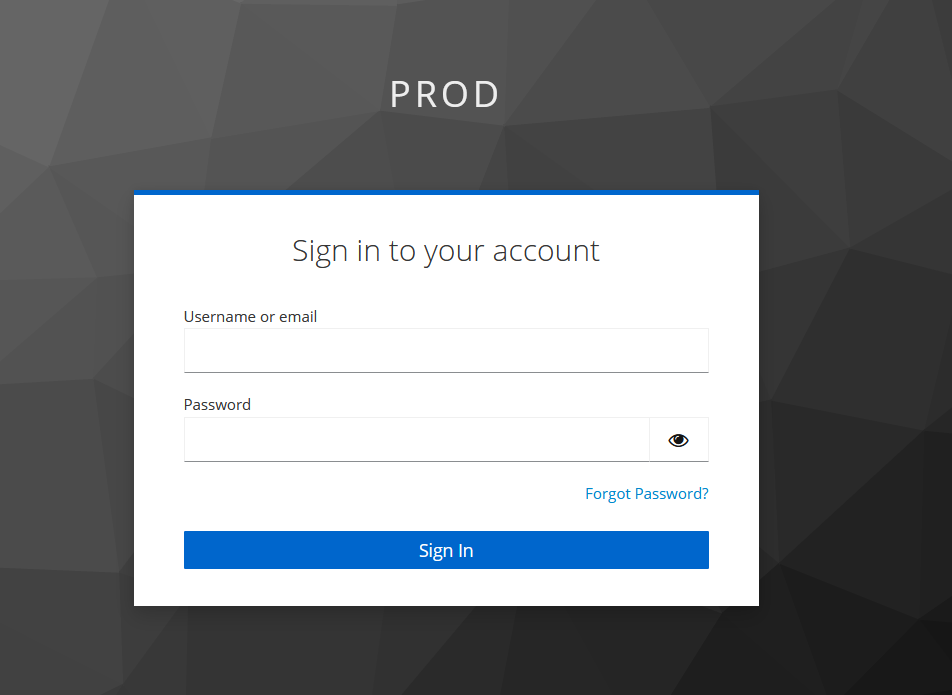
After clicking the SSO source and signing in, you should see a Keycloak sign in page:
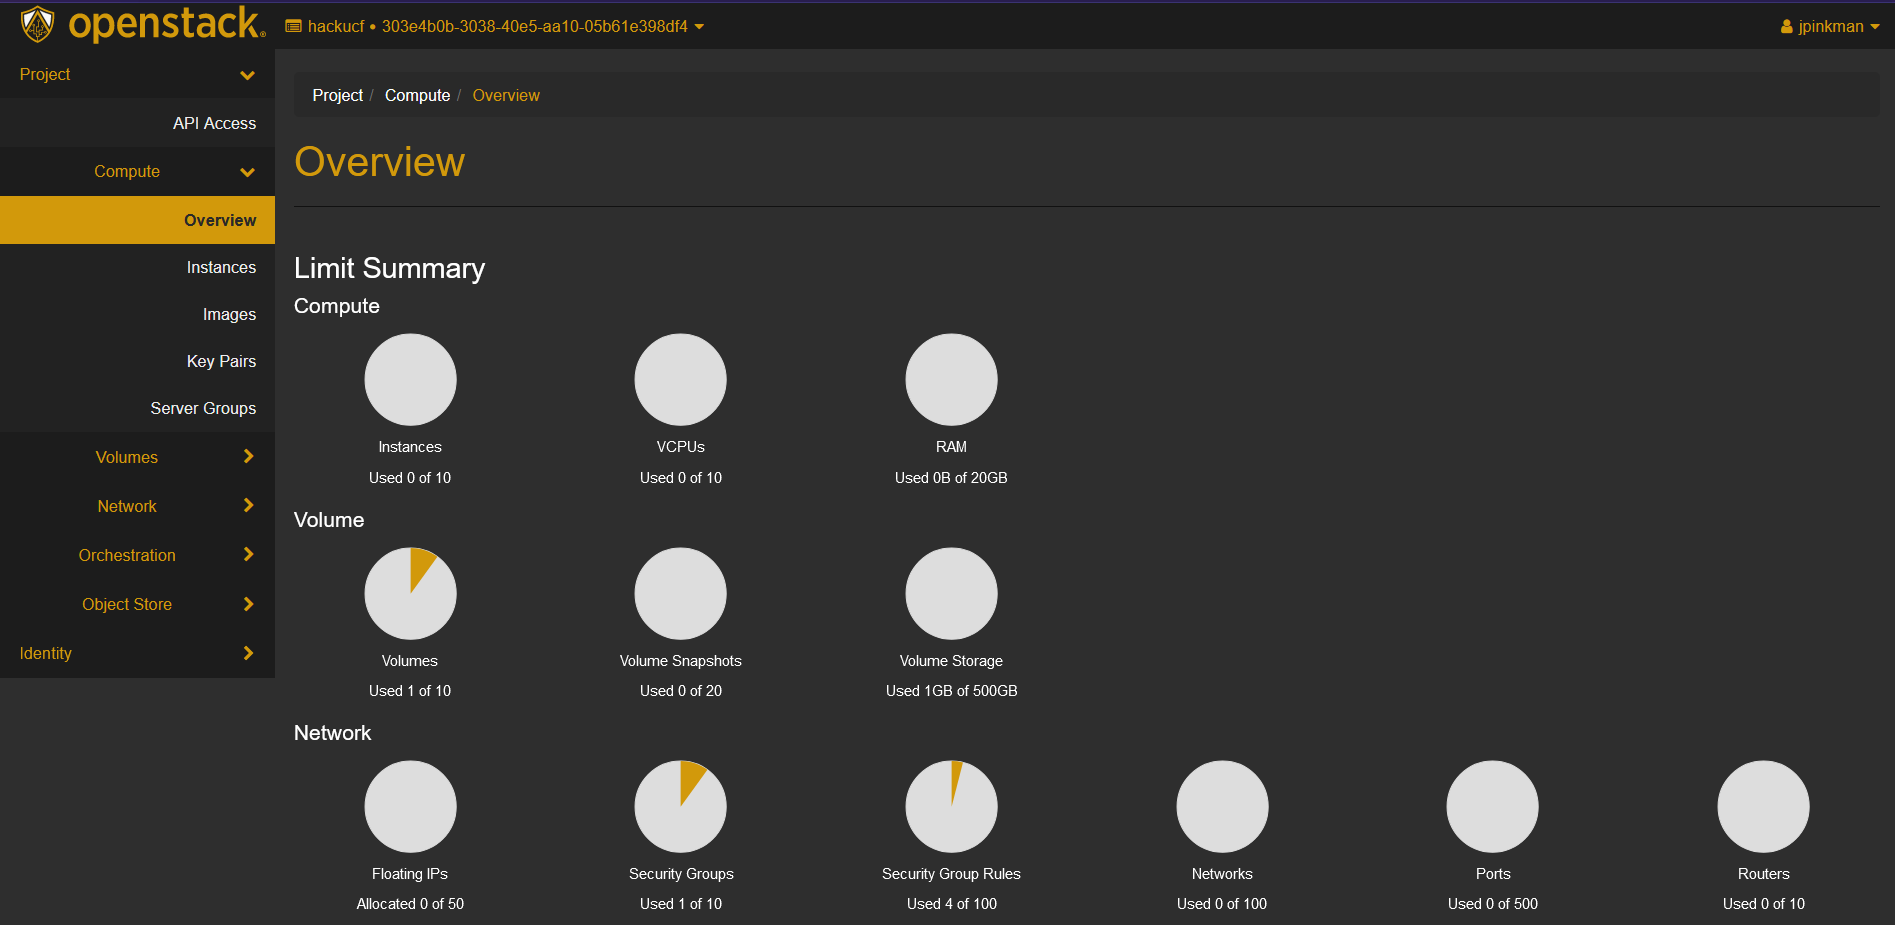
After you authenticate to Keycloak, you should see the dashboard page after a few seconds:
Congratulations! You should now have a functional Keycloak and OpenStack integration!
Troubleshooting
Below are some of the errors that we experienced while testing the functionality.
Time out on “Sign In” Redirect
This is typically a result of Horizon not using the public keystone endpoint to connect and hand it off to Keycloak. This can be mitigated by adding horizon_use_keystone_public_url: true to the globals.yml file.
401 Errors
If you get a 401 error at any point in the process when trying to sign into OpenStack, something went wrong with the files being copied over or OpenStack being configured.
Things to check:
- Correct file paths in the
globals.ymlfile- Correct file locations based off of paths
- Federation mapping
- Use
openstack federation listto check if the mapping got created
- Use
403 Errors
There are a few things that happen to get a 403 error. The most common being that the user mappings do not allow for a user to be created. The second most common issue is that the trusted dashboards are not properly configured.
Fixing User Mappings
This is typically a period of trial and error, but I would recommend following the above attribute mapping json block as a guide of how to set up users. If you have a need for a secondary gate (like an authorization access to the platform via a group role), I would build out a block something like this:
1
2
3
4
5
6
7
8
9
10
11
12
13
14
15
16
17
18
19
20
21
22
23
24
25
26
27
28
29
30
31
32
[
  {
    "local": [
      {
        "user": {
          "name": "{0}",
          "email": "{1}",
          "domain": {
            "name": "hackucf"
          }
        },
        "domain": {
          "name": "hackucf"
        },
      }
    ],
    "remote": [
      {
        "type": "OIDC-preferred_username"
      },
      {
        "type": "OIDC-email"
      },
      {
        "type": "OIDC-groups",
        "any_one_of": [
          "Authorized"
        ]
      }
    ]
  }
]
This will prevent a user from being created unless they have the associated “Authorized” group from Keycloak.
Fixing Trusted Dashboards
To diagnose this issue you need to look at the logs for keystone. If you have a centralized logging solution you should look for 403 errors with the text "trusted dashboard". Otherwise you will need to go to each controller and check the logs manually with the following command:
1
cat /var/log/kolla/keystone/keystone-apache-public-error.log | grep "trusted dashboard"
To fix the issue (until someone (maybe me) makes a PR) in the meantime, add your trusted dashboards for Horizon/Skyline to your keystone.conf
1
2
3
[federation]
trusted_dashboard = https://horizon.example.com/auth/websso/
trusted_dashboard = https://horizon.example.com:443/auth/websso/
Resources
These are the resources I used while getting Keycloak and OpenStack working: